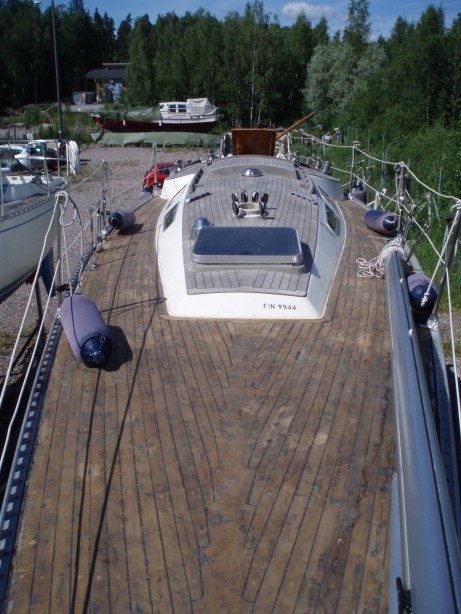
Teak deck revival
29 years and 3..4 sandings had been enough to put the teak deck of 'MyWay' into dire need of refurbishing. Secondly, water was seeping into the balsa sandwich deck, so a repair was due, anyways.
I like the looks and properties of a teak deck. However, prefabricated material for a new teak deck costs 300+ € /m2, teak imitations about the same, and the labor cost more than doubles the bill. The stories on web pages of West Systems and Nils Malmgren epoxy suppliers encouraged me to try recycling of the teak on my own.
I did the work in three stages: first spring the rear deck, next spring the foredeck, and then the cabin top. Doing it myself, this kept the work in manageable 'hobby' extent.
Preparations: remove all bits and pieces that are bolted on or through the teak: stanchions, genua rails, winches, hatch collars, etc.
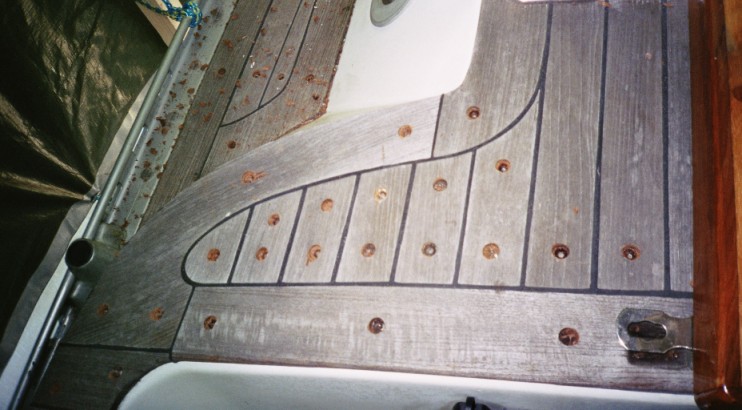
Drill open the plugs that cover the screws in the teak planks. Remove the 900 screws that attach the teak planks to the deck.
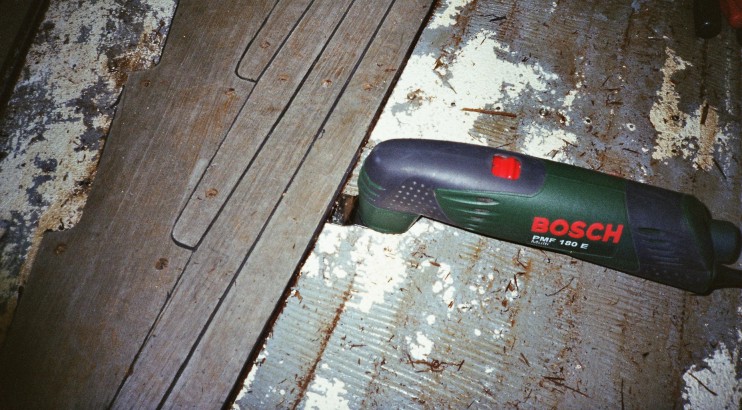
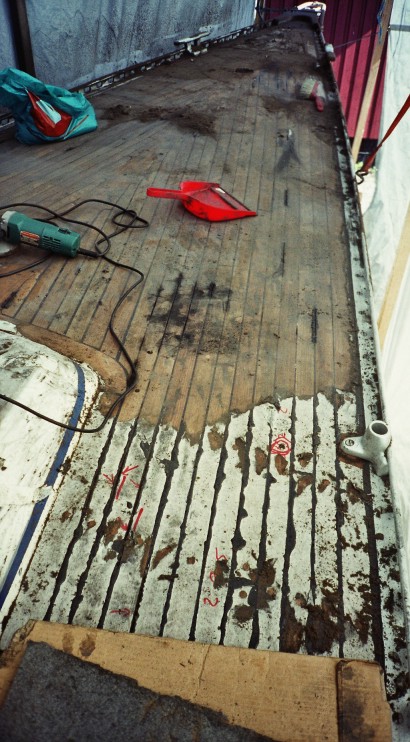
Break loose and take up the teak planks starting from a point easily accessible. I used a Bosch Multitool, pushing the cutting knife tongue under the teak planks one at a time. When the rubber cement has been cut loose for the whole length of a teak plank, it can be lifted up without damaging it. Then you do the same for the next plank, and so on; a lot of work, thou.. This is also the critical phase in the 'recycling': if the planks sit so tight that you really do not get them loose intact, better to move to plan B.
Prepare the teak: First clean the residues of old seam caulking and rubber cement; I used a small hobby over/under cutter for the straight sections and a knife for the curved parts.
Work the 9..12 mm thick planks into 5..6 mm thick ribs with an over/under cutter. I first took 1 mm away from the bottom of each rib, to get a clean fresh surface for gluing it back; then I worked each rib into thickness of ~5 mm by removing the excess from the top side. A healthy shiny teak surface emerged.
Sand the bottom side of each rib and degrease with acetone or similar.
At the end of the exercise, I had a fresh set of teak ribs about 5 mm thick. I stored them inside to keep them dry till the job was ready to proceed.
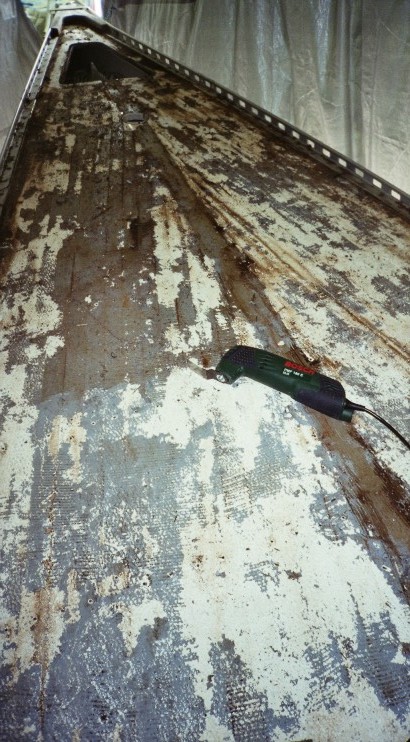
Repair the sandwich of the deck from water leaks where needed. This can be quite a job, and there are separate descriptions on how to do it. The repair is easier to do from above the deck when the teak has been removed, than from below in the cabin.
Prepare the deck surface for gluing the teak back: Remove residues of old rubber cement from the deck, and use a sander or grinder to get the deck surface clean and smooth. Degrease the deck with acetone (protective breath mask to be used..)
Epoxy: The idea of gluing the teak with epoxy comes from West System and Nils Malmgren epoxy producers. I used West 105 epoxy with 206 hardener which are well documented and come with practical dosing pumps.
Before starting, cover all the other parts of the boat with protective plastic and paper sheets. Cover also the top side of the teak ribs with good quality masking tape.
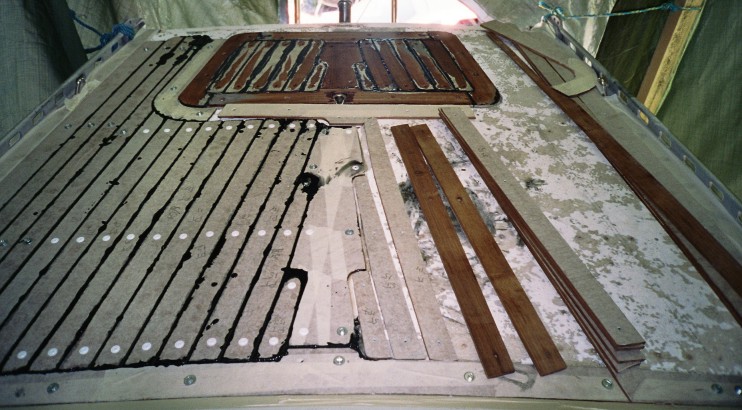
Laying the teak deck back: Select an area that you can handle within the curing time of a batch of epoxy: 30 minutes or so. Mark the border of the area to the deck.
Mix a small batch of epoxy: use a brush to wet the selected area of the deck and the bottom side of the teak ribs for that area. Mix speedily another batch and thicken it to consistency of ketchup. Spread the thickened epoxy over the wetting epoxy. Use protective mask, gloves and eyewear when handling the epoxy.
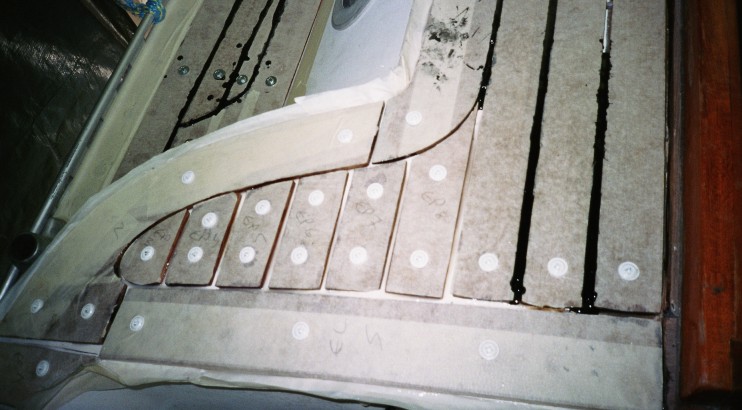
Place the pre-wetted teak ribs back into their original locations. I used sheet metal screws in the original screw holes, to keep the ribs in place for the epoxy to cure.
Fill the seams: mix a batch of epoxy, add graphite powder for black color and UV protection, and thickener for ketchup consistency, and fill the seams between the teak ribs with this black epoxy, using a large syringe. If you do this before the epoxy under the teak ribs has cured (~1 hr), the epoxy in the seams will bond with the epoxy at the bottom.
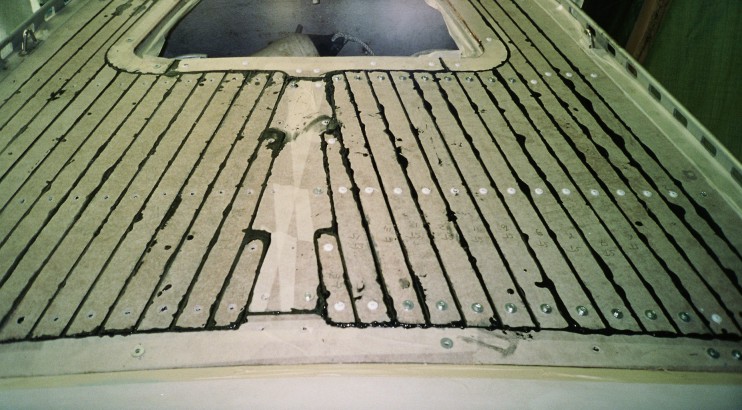
And then, mark a new section of the deck, and lay the teak ribs and fill the seams, till you have re-laid all the teak.
Finishing the work: When the epoxy is cured after 2..3 days, remove the sheet metal screws, and close each screw hole in the teak with a 10 mm teak plug and a drop of epoxy that also seals the screw hole in the sandwich deck surface.
After 2 more days, cut the excess of the plugs, and then sand the deck lightly to remove excess epoxy on the seams. Then you may finish the seams around the teak section against cabin walls and toe rails with Sikaflex. Use a mask for breath and eye protection when sanding the epoxy; the epoxy dust is nasty.
Then you can re-attach all the fittings that you removed in the beginning, and that is it.
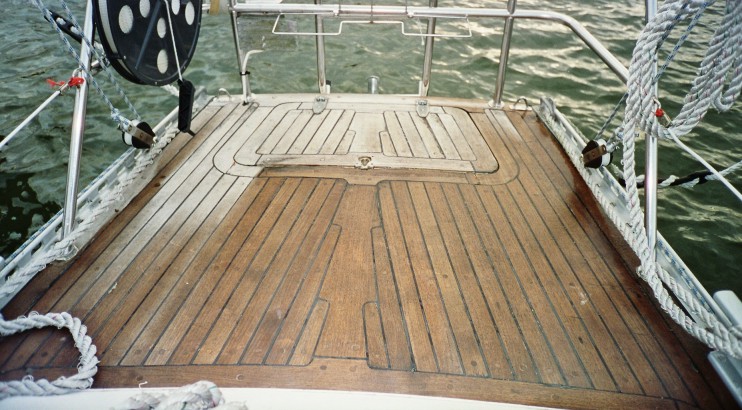
Closing remarks: you now have a 'new' thin teak deck that can take 1...2 sandings over the coming years. It is in place without any screw holes so the deck is likely more watertight than before. And you have saved part of a tree in the rainforest by recycling the teak.
Note on teak treatments: I have left the teak untreated because I like the natural gray color it takes and, secondly, because the chemicals and oils in the teak treatment might be harmful to the epoxy seams. 'Boracol' is used against algae.
Plan B: if taking up the planks more or less intact fails, you can proceed with removing the teak and cleaning the deck surface. Then you may: a) make patterns of the deck sections and order made-to-measure teak modules, to be glued onto the deck; b) rebuild the deck using a teak imitation; c) use a anti-slip cover glued to the deck, or d) use a anti-slip paint to finish the deck.
-
![]()
|
Back to: Mods and repairs - outside |